Your Cart is Empty
Immerse yourself in a world of selections at one of our
stunning East Coast showrooms. Architessa sources our tile both
domestically and internationally, bringing the best of porcelain,
natural stone, ceramic, and more to convenient locations and through
our national commercial representatives Contact us to
explore an in-store or virtual appointment with an Architessan. Orders
ship worldwide or can be picked up at Architessa's warehouse
locations. Delivery options are available for orders within Virginia,
Maryland, and D.C.

Immerse yourself in a world of selections at one of our stunning East Coast showrooms. Architessa sources our tile both domestically and internationally, bringing the best of porcelain, natural stone, ceramic, and more to convenient locations and through our national commercial representatives.
Contact Us to explore an in-store or virtual appointment with an Architessan. Orders ship worldwide or can be picked up at Architessa's warehouse locations. Delivery options are available for orders within Virginia, Maryland, and D.C.
Tile is a frequent topic of discussion in design and always overshadows its essential counterpart, the grout. Grout may seldom be shiny or interesting but is just as important as the tile for both the design and the structural integrity of the surface. If tile is the meat and cheese, grout is the bread, and what is a sandwich without the bread? Grout is an essential part of most tile designs, and in this guide, we will talk about its role in design, the technicalities and nuances you should be aware of, installation tips, and more.
When it comes to tile installations, grout is the medium used to fill in the gaps between ceramic, glass, and natural stone tiles. In terms of importance, grout is high on the list because of the big role grout plays in design. Grout can completely change the trajectory of a project's look and feel if not carefully discussed and selected alongside the tile. Care & maintenance of grout is equally important. Some tout that poorly maintained & damaged grout can decrease the value of your home!
Read on to learn a few things about grout and bookmark key resources along the way.
There are essentially two main categories of grouts: cement-based and non-cement based. Cement based grouts make up the majority of products most commonly used. The base ingredient in cement-based grout is Portland cement. There are many cement-based products now available, some with additives that improve performance, such as mildew resistance or antimicrobial properties, uniformity, hardness, flexibility, and water retentivity.
The other class of non-cement-based grouts include epoxy, urethane, furan, and premixed polymer resin grout. These products offer properties not previously achieved with cement based grout, and may be required for specialty material. Regardless of what type of grout your project needs, know that they are sold in two different formats:
Now that you know some grout basics, let's review types of grout:
CEMENT-BASED GROUTS
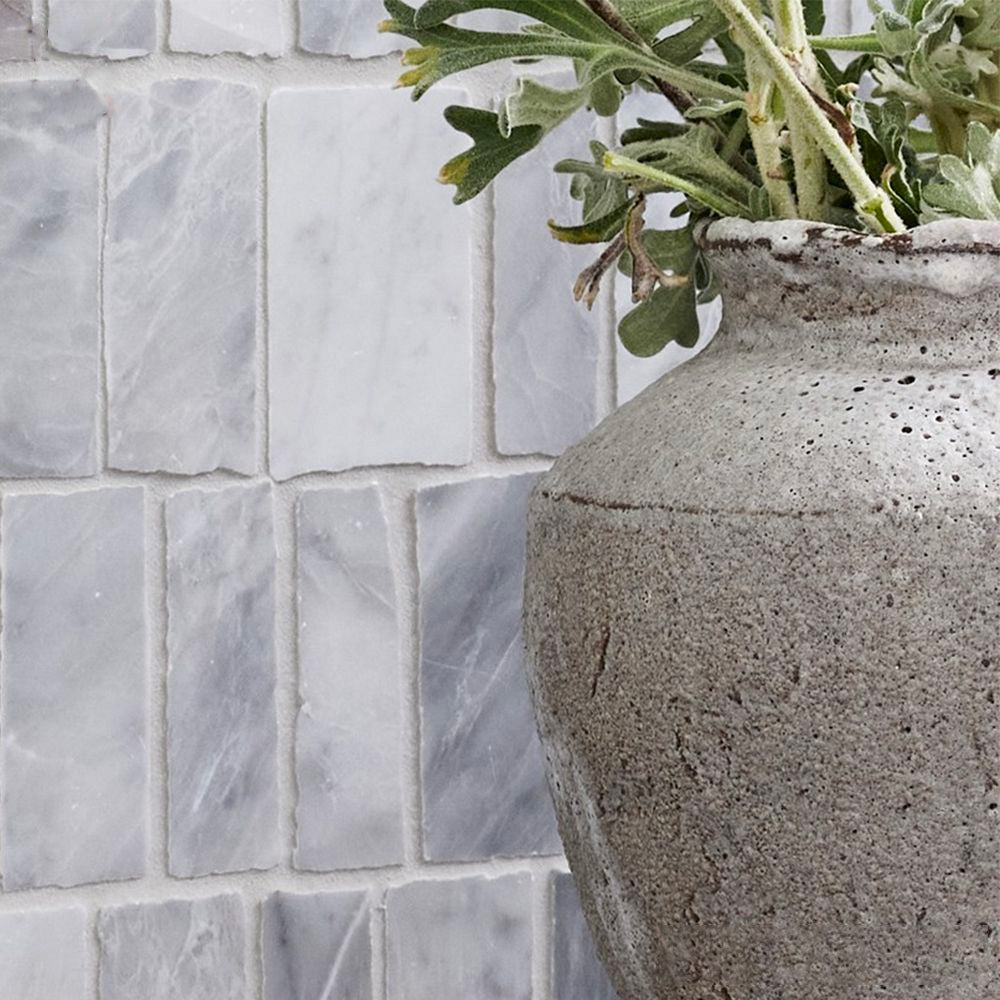
SANDED GROUT (⅛" ≤ grout joints) - A large amount of material can be grouted with sanded grout. This includes ceramic mosaics, quarry tiles, pressed floor tiles, porcelain tiles, cast glass (also known as through-body glass), and some natural stones. Sanded grout is to be avoided on material susceptible to scratching, such as polished, glossy, or sometimes specialized finishes.
UNSANDED GROUT (1/16" to ⅛" grout joints) Wall tile, polished surfaces, and rectified tiles are typically grouted with unsanded grout. The size of the grout joint allowed with unsanded grout ranges from 1/16" to ⅛" and should not exceed ⅛".
HIGH-PERFORMANCE GROUT OR HYBRID (recommended grout joints vary by manufacturer) - This class of grouts has additives, such as latex/polymer powder, antimicrobial ingredients, and sealers, which classify them as high-performing grouts. Architessa carries Permacolor Select by Laticrete within this category. Permacolor is a two-part system where the colorant is sold separately and must be mixed in. Large market share and corresponding shelf space are now dedicated to high-performing grout. Each manufacturer establishes standards for grout joint size recommendations within this class. Laticrete Permacolor also offers a pre-mixed option, which may be more suitable for small jobs.
NON-CEMENT-BASED GROUTS
EPOXY GROUT- Epoxy is a grout employing epoxy resin and hardener portions, often containing coarse silica filler, which has been engineered for industrial and commercial use, where chemical resistance is prioritized. Epoxy is the most popular non-cement-based grout as it is not porous. Epoxy was historically used in hospitals & industrial purposes, and was initially difficult to work with. Over time, the industry has evolved, as has the formulas for epoxy, making it easier to work with, albeit special skills and precautions are still required. Epoxy has unique features:
Note: Certain materials, such as glass or polished natural stones, are not approved for use with epoxies. Chemical and stain resistance can vary between manufacturers, so consult with the manufacturer or distributor on application suitability. Exterior applications may not be compatible with epoxy.
HIGHLY SPECIALIZED - This class of products includes Furan Resin, Pre-mixed Polymer Resin, and urethane-based grouts. These are highly specialized grouts, not typically used in common commercial applications, and sparingly used residentially. Highly specialized tile may require specific handling or installation, and require a grout in this category, however, this is unusual, as manufacturers actively work to make tile easier to install, not harder.
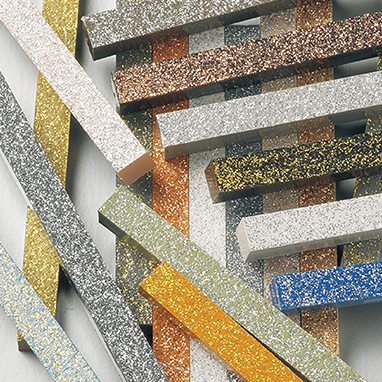
A unique opaque color that diffuses light & color. Often used with colored glass tile & mosaics combined with the Dazzle additive.

SPECTRALOCK® DAZZLE™ is a unique design element that enhances your epoxy grout projects with a glitter additive.

Enhance grout designs at night by adding a "Glow-In-The-Dark" additive to your SPECTRALOCK Epoxy grout by Laticrete.

Regarding design, layout, and overall feeling in a space, grout color is equally important as the actual tile and can make a big design statement or blend into the background. Despite its importance, discussions, and selection of grout color are often overlooked until later in the installation process. This can lead to disappointment in the final project when design expectations are not met due to the big role grout plays. It is always best to include grout & tile selection & discussion together with your designer & installer to manage design & installation expectations upfront.
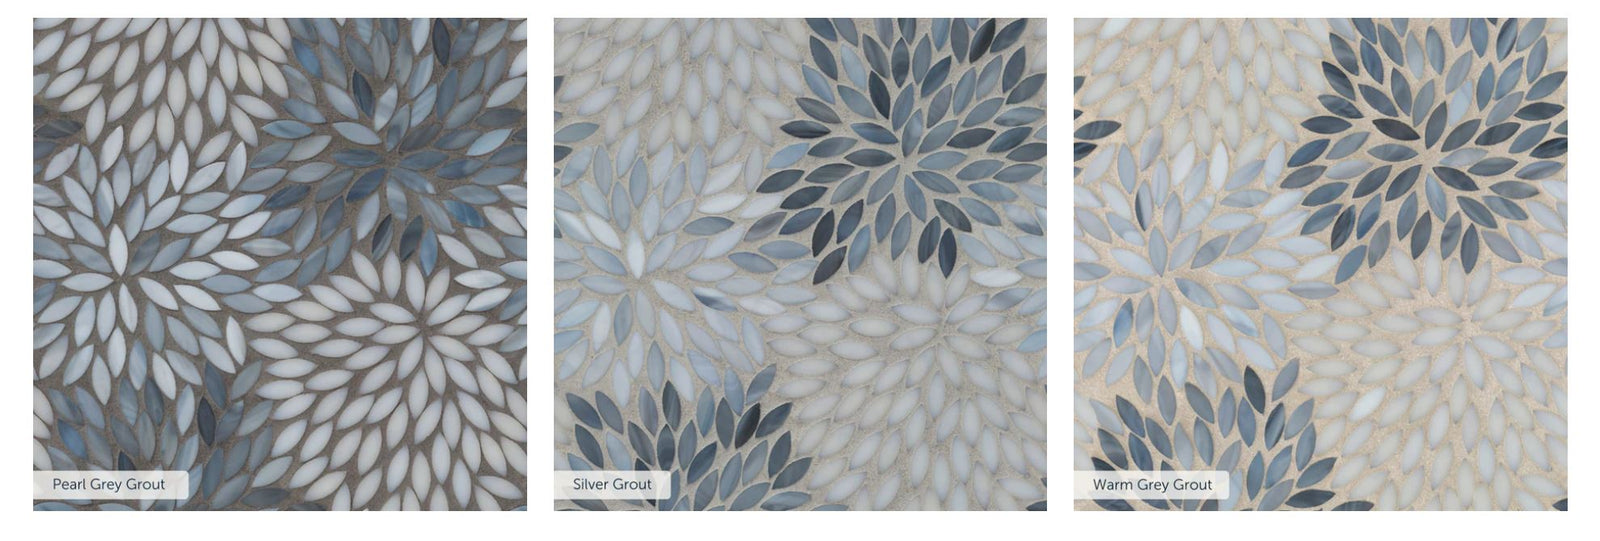
The information below shows just how important grout is as a design element. Our Estrella mosaic shows that grout dictates the design in this mosaic, which means other tile selections in the project should be chosen after the grout color is chosen. In this case, grout dictates the entire scheme of the project.
SeeESTRELLA above, a mosaic with a delicate petal shape, grouted 9 different ways in this case study.

We don't have an easy button for grout, but if you need extra assurance, you can always create a grout sample mockup with extra material, grout, and time. You can also mimic this type of set-up by using a large piece of colored poster board as your grout to get a sense of color, or simply use grout stick samples, which tile stores & tile setters can provide.
Grout mockups are not something a tile installer includes in a standard quote, so request this ahead of time before your quote is provided. There is extra cost and time needed to create & discuss any desired mock-ups.
Chiseled, antique, incongruent, & handmade tile edges often rely on grout to create the intended look. The tile's imperfect edges, large gaps, and even chips are completely defined and highlighted by the choice of grout that fills them. KALIP, LAUREN LIESS HABITAT TERRA, and VERANDA Collections all have imperfect edges to feature.

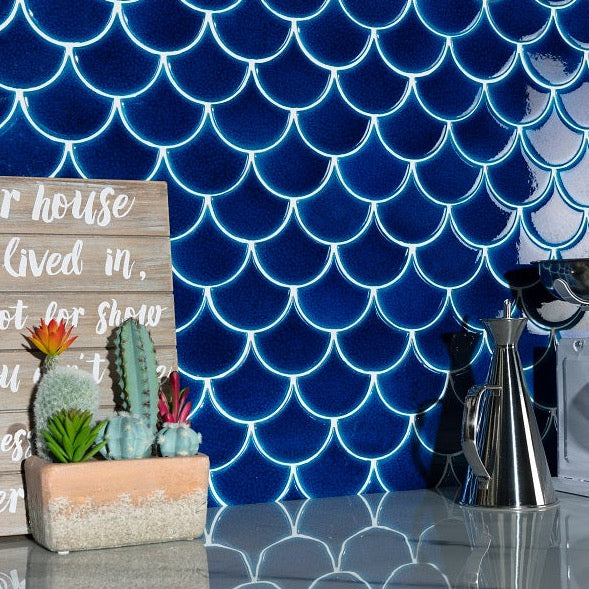
Tile Shapes require a careful grout color decision in order to exist visually. Our FANFARE scallop would disappear into the deep sea without a light grout color. Conversely, tile patterns may need to blend or stand out depending on pattern dynamics and larger design schemes.

Custom murals, ombre mosaic walls and really any tile project can show blended grout. This means careful planning, extra time/grout and budget, and a skilled installer. Our gallery shows an example of grout blending into the background in the Grateful Dead Rockin' Custom Mosaic.

An area with high visibility, such as a fireplace or backsplash, will stand out with contrasting grout colors. On the other hand, you might find your decision more flexible in a space less visible, such as a powder room or guest bath. Wood Slat Tiles are appealing with blended grout.
Matching the color of your tile creates a more subtle look, whereas a contrasting grout color makes the shape & pattern the grand feature. White subway tile with dark gray grout pays homage to the early days of design. Before grout was invented, cement was used in place of grout, which meant dark grey was the only option.
The below image from Whytile.com shows subway tile grout instantly transforming a space from contemporary on the left to traditional on the right, simply with a change in grout color.
These Pinterest boards are a window into the world of grout trends & unique designs.
When rectified porcelain was introduced to the market, grout lines began to shrink. Rectified tiles and technological advancements in grouts opened flexibility in grout joints. Rectified porcelains are typically installed with ⅛" grout lines. Still, there are no rules or technical guidelines for grout size, except that the minimum required joint width for ceramic tile and natural stone tile is 1/16". The TCNA states that anything less than 1/16" is called a butt joint and does not provide sufficient accommodation for dynamic building movement, differential thermal expansion, or allowable variation in fabrication or manufacturing.
Consider the material features:
Minimum Grout Joint
The minimum grout line thickness always depends on whether your tile is manufactured with a rectified or pressed edge. To meet the project's design aesthetics, discuss this with your salesperson and installer.
As you know by now, many factors will play a role in what grout joint is best for your job. The chart below can be used as a general guide to discuss grout joint size & grout type suitable for your project.

The tile industry is lucky to have the Tile Council of North America (TNCA) to guide us in material, installation, and grout. You can find a direct link to their library of grout topics here, which is available free of charge, or you can purchase the TCNA Handbook for comprehensive information.
The TCNA is full of information required to install tile, so don't discount this tremendous industry resource. The two standards organizations that the TCNA Handbook uses to develop its recommendations are ANSI and ISO. Grout 101 won't review the Handbook, but you should know this one fact in section 4.3.8.
"The actual grout joint size shall be at least three times the actual variation of facial dimensions of the tile supplied."
-TCNA Handbook, Section 4.3.8

The Tile Council of North America offers FAQs in their library of grout as a complimentary resource to the public.

Download specifications, details, or document submittal packages in just a few steps in Laticrete's Architectural Guidebook

Use this guide to understand what your tile contractor will consider when assisting you in selecting the best grout for your project.
To learn about all the organizations behind tile standards, visit the Tile 101 resource in the Architessa Tile Learning Center, which summarizes ANSI and ISO.
ANSI (American National Standards Institute): ANSI Facilitates voluntary national consensus standards for ceramic tile manufacturing and installation systems.
4.3.8 Grout Joint Size: To accommodate the range in facial dimensions of the tile supplied for a specific project, the actual grout joint size may, of necessity, vary from the grout joint size specified. The actual grout joint size shall be at least three times the actual variation of facial dimensions of the tile supplied. For example, for tiles with a total variation of 1/16" in facial dimensions, a minimum of 3/16" grout joint shall be used. The nominal centerline of all joints shall be straight, with due allowances for hand-molded or rustic tiles. In no circumstance shall the grout joint be less than 1/16".
4.3.8.1 Running Bond/Brick Joint Patterns: For running bond/brick joint patterns utilizing tiles (square or rectangular) with any side greater than 15", the grout joint shall be, on average, a minimum of 1/8" wide for rectified tiles and, on average, a minimum of 3/16" wide for calibrated (non-rectified) tiles. The grout joint width shall be increased over the minimum requirement by the amount of edge warpage on the longest edge of the actual tiles being installed. For example, for a rectified tile exhibiting a 1/32" edge warpage on the longest edge, the minimum grout joint for a running bond/brick joint pattern will be 1/8" + 1/32" or 5/32", on average. Of necessity, in any installation, some grout joints will be less and some more than the average minimum dimension to accommodate the specific tiles being installed.
4.3.8.2 Running Bond/Brick Joint Offset: For running bond/brick joint patterns utilizing tiles (square or rectangular) where the side being offset is greater than 18" (nominal dimension), the running bond offset will be a maximum of 33% unless otherwise specified by the tile manufacturer. If an offset exceeding 33% is specified, the specifier and the owner must approve the mock-up and lippage.
ISO (International Organization for Standardization): ISO is an international standard-setting body comprising representatives from various national standards organizations.
HOW DO I KEEP MY GROUT LOOKING NICE?
After spending time, money, and energy on a tile project, it is important to protect the grout from being ruined by stains or dirt. Grout needs to be cleaned regularly because it is a naturally porous material. As we tile areas routinely used, like bathrooms and kitchens, grout is exposed to moisture and dirt every day, which can cause discoloration and, eventually, mold growth.
As grout ages, it can develop micropores from wear & tear over time, where dirt can hide and build up in pockets. Cleaning grout properly is vital for maintaining the design of your tiles and preventing the tiles and the surface beneath from becoming damaged.
Walk-off Mats
CLEANING GROUT
Routine cleaning & vacuuming are the best ways to maintain your tile & grout. Routine grout cleaning can be done with an all-purpose household cleaner that is non-oil-based and has low VOC, depending on the application. For periodic deep cleaning of the grout, use a concentrated tile & grout cleaner. Always read and follow the instructions on the product label. Rinse the area with clear water and pat dry with a clean towel or sponge to remove any residue. As true for all tiled surfaces, do not use acidic solutions/cleaners as part of a regular maintenance routine.
HOW DO I CLEAN GROUT?
Routine & frequent cleaning is recommended to keep grout stains to a minimum and prevent a buildup of dirt that could prove difficult to remove if left unaddressed. Daily cleaning may be necessary for commercial applications, and weekly may be more appropriate for a residence. However, as we all have busy lives, cleaning grout as often as we would like might not be practical. Cleaning grout is straightforward; whether you need to restore heavily stained grout or simply want to keep on top of things, a few basic household products and a bit of hard work can make your beautifully tiled bathroom or kitchen look like new.
GROUT CLEANING RULES
HOW OFTEN SHOULD I CLEAN GROUT?
Floor tiles need to be cleaned regularly, preferably weekly. Remove debris and dust like pet hairs or dropped food, giving you a smooth surface to clean. After cooking, spray and wipe the kitchen tiles clean, as there will be food stains and condensation.
Wet Areas: Using a squeegee after the shower or bath removes excess water and is one of the best habits for general tile cleaning & maintenance. When possible, cleaning directly after a bath or shower will help remove soap scum, and bacteria, which is the culprit of most grout problems. In addition, a weekly clean of any tiled area will help prevent dirt buildup from staining or damaging your grout. Remove any excess debris and dust before spraying and wiping bathroom tiles.
DO I HAVE TO SEAL MY GROUT?
Grout that has been sealed still must be cleaned. Sealing may help protect against stains a little longer than unsealed grout, but it is not a replacement for cleaning and maintenance tasks, nor does it allow you to clean less frequently. You will still need a regular cleaning schedule to prevent stains from setting in your grout or mold from developing.
CHANGING THE COLOR OF EXISTING GROUT
If you are unhappy with your grout color, you may be able to paint over the grout. Grout colorant kits are available on the market in a curated selection of colors that can be painted on your grout joints. This is not an easy or fun task and may not be something a professional will take on. If patience is your virtue, pause and consider if your efforts would improve the space. Sometimes, inherently bad design can't be improved. That is why extensive grout design considerations should be made before installation, if possible.
TROUBLESHOOTING
An experienced professional should look at grout that needs repair. If your grout is cracked or crumbling in areas, it may be able to be restored with grout caulk or professional regrouting if required, but it may also be a deeper issue. Missing or cracked grout could mean a larger problem is the cause, and fixing symptoms will only be temporary. Grout should not have major failures, and many factors could contribute to a failure, such as improper soft joints, omission of caulk during a change in plane or material transition, poor thinset coverage, or structural problems. Grout caulk can help fill minor gaps in the grout. Still, a job needing to be regrouted entirely is a labor-intensive undertaking and not a favorable job for contractors with busy schedules, nor a good long-term solution if there are other issues.
Grout Mold
Grout, which has surface mold, or worse, is one of the most frequently misunderstood topics due to a lack of straightforward information. Showers and baths are playgrounds for bacteria, which come from soap, shampoo, and people. When used, these areas become covered with organic matter, which will cause mold if not cleaned properly or timely. Surface mold is one of the most common problems in showers, but typically the easiest to address through scheduled cleaning & maintenance - including the tip earlier on using a squeegee.
In cases where you have an established cleaning routine and mold persists it may be a deeper issue. There are many ways a wet area can fail, ranging from improper waterproofing, clogged weep holes, improper drain slope, thin-set coverage, etc. This could mean that the culprit of stubborn mold may be a deeper assembly issue and, indeed, not surface mold at all - it may be coming from under the tile, which means it will not disappear with any cleaning muscle. Showers can fail almost immediately or take 20+ years to fail. In these cases, a full replacement may be the only way to shut down stubborn or persistent mold.
White Grout Residue
If you have white residue that can be easily removed, you are dealing with dried products (soaps, cleaning products, shampoo, oils) that have settled into the grout. The shavings will either be soapy when water is introduced or oily if it is conditioner, lotion, or hair treatment. If shavings can be scraped, it may be an accumulation of soaps, cleaning products, or hard water buildup. If the white residue is powdery, it is efflorescence.
Efflorescence
You may have efflorescence if you have a powdery white residue that reappears. Efflorescence is a white powder that may appear on a stone's surface caused by water carrying mineral salts under the installation to the surface, which has evaporated. When the water evaporates, it leaves a powdery salt residue. Typically, efflorescence is a minor inconvenience that can be remedied without replacing the tile or grout. If the installation is new, dust mop or vacuum the powder. Repeat as necessary as the stone dries out. If the installation is not fresh, follow regular cleaning procedures and use a Stonetech cleaner.
When the efflorescence cannot be treated, a more significant problem underneath the tile may be present (moisture in the substrate, etc.). Read more about efflorescence from the Ceramic Tile Education Foundation.
Grout Haze
After tile installation, grout residue can form a haze-like film on the surface of the tile, often white in color. This can be buffed off the surface using a clean cloth once the grout has finished curing. If the residue is very stubborn or the tiles are unglazed, a special grout haze remover solution may be used. Read and follow the instructions on the product label. The solution will break down the cement and allow the haze to be wiped away. Rinse the area with clear water and wipe dry with a clean towel or sponge to remove any residue.